You can make rich, creamy nut butter right in your blender with just a few simple steps, and it is easier than it sounds. Start with the right nuts, then work slowly so the blades can do their job without overheating. After that, a few smart tweaks can turn a dry mess into something smooth and spreadable. If you have ever wanted homemade nut butter without the store-bought price tag, the next steps will show you how.
What You Need to Make Nut Butter in a Blender
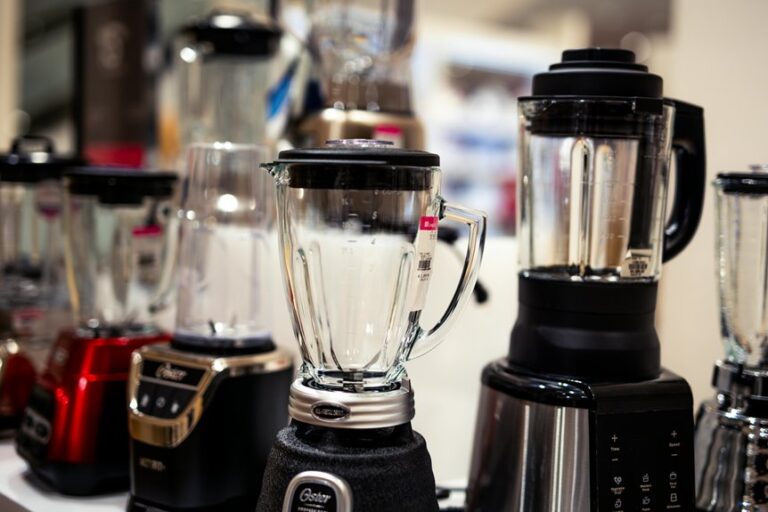
To make nut butter in a blender without frustration, start with the right setup. Use a high-speed blender if you can, since it breaks down nuts faster and gives you a smoother finish. You’ll also want the right blender size, because a small batch needs room to move, not a cramped crowd.
Aim for about 2 cups of nuts, and keep your ingredient prep simple. Measure add-ins like salt, honey, maple syrup, cinnamon, or a little avocado oil before you begin. Raw or lightly roasted nuts work best, and warm nuts blend more easily.
If you’re sharing the kitchen with family, this setup helps you feel ready, calm, and part of the win. With these basics in place, you can blend with less stress and more confidence.
How to Make Nut Butter in a Blender
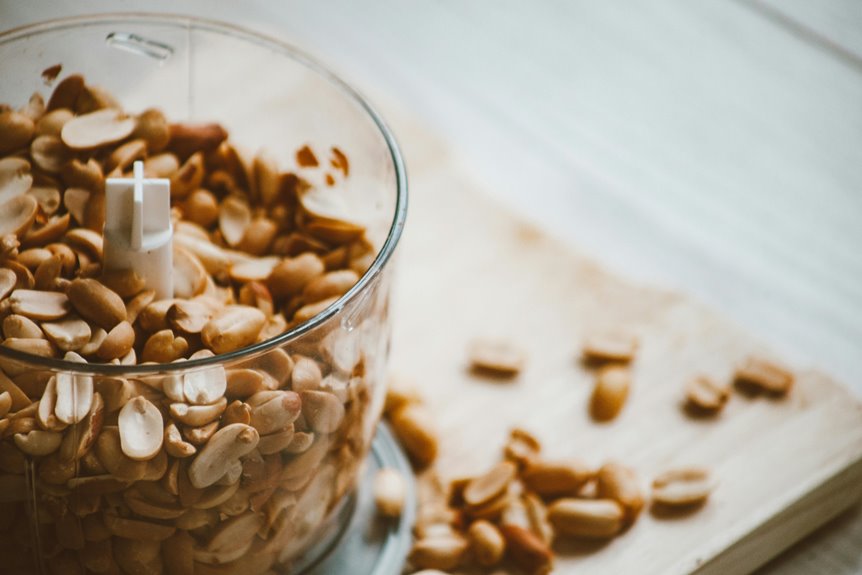
Start with a small batch of nuts in your blender and let the machine do the initial hard work for you. Keep the batch size modest, about two cups, so the nuts can move freely and your blender stays stable. Begin on low, then pulse until you get crumbs. After that, blend in short bursts and scrape the sides often.
You’ll watch the mix shift from meal to thick paste, then to a creamy butter. Whenever the blades slow down, pause and let the motor rest for a minute. A tamper can help, provided your blender has one. Add a pinch of salt or a little honey only after the butter starts to smooth out. With patience, you’ll end up with a spread that feels homemade and welcoming.
Choose the Best Nuts for Blender Nut Butter
Almonds, cashews, peanuts, and hazelnuts all work well in a blender, but the best choice depends on the texture you want and how patient you feel today. When you want a silky spoonful, pick cashews. When you want a classic pantry win, peanuts are one of the best nut varieties. Almonds give a firmer, richer spread, while hazelnuts bring a cozy, dessert-like touch. For flavor friendly nut choices, consider what fits your snack style and your crowd.
| Nut | Texture | Taste |
|---|---|---|
| Almonds | Thick | Mild |
| Cashews | Creamy | Soft |
| Peanuts | Smooth | Bold |
| Hazelnuts | Velvety | Sweet |
| Mixed nuts | Balanced | Rounded |
You will feel right at home choosing any of these, and your blender can handle them.
How Long Nut Butter Takes in a Blender
Nut butter usually takes anywhere from a couple of minutes to about 15 minutes in a blender, and the exact time depends on your machine and the nuts you use.
With a powerful blender and warm, lightly roasted nuts, the mixture often moves from crumbs to a creamy paste much faster.
Slower blenders, tougher nuts, or a larger batch can stretch that time, so it’s better to watch the texture than the clock.
Blender Time Basics
Most nut butter takes longer than people expect, but that’s normal, and your blender isn’t failing you. For blend duration basics, think in stages, not minutes alone. You may see whole nuts turn into crumbs, then a thick paste, then a creamy spread. That shift can take about 1 to 15 minutes, so patience helps you feel at ease in the process.
Use timing checkpoints to keep track: pause to scrape the sides, check the texture, and keep blending until it looks smooth and glossy. If it still seems dry, give it more time. A little waiting often brings the batch together, and that’s the point where your kitchen starts to smell like you really know what you’re doing.
Factors That Affect Timing
When your nut butter takes longer than expected, the blender is usually reacting to a few simple factors, not malfunctioning. Blender power matters most, because a stronger motor breaks nuts down faster and keeps the mixture moving. Batch size also matters, since a full load crowds the blades and slows oil release.
You’ll usually move through the same stages:
- whole nuts turning to crumbs
- crumbs becoming a thick paste
- paste turning creamy and spreadable
Warm nuts and regular scraping also help, because they prevent dry pockets from stalling the blend. If you’re using a less powerful blender, give it short rests so it can stay steady. Keep the load modest, and you give your blender a fair chance. That’s how you get smooth results in the kitchen.
Tips for Smooth, Creamy Nut Butter
For the smoothest nut butter, blanch the nuts first so the skins come off and the texture becomes softer and silkier.
Then add the oil slowly, a little at a time, to maintain control and avoid a greasy spread.
With that careful approach, you’ll get a creamier result that’s much closer to the store bought kind.
Blanch For Extra Smoothness
To get the smoothest nut butter, start with nuts that are already blanched or trimmed of their skins, because those thin skins can leave tiny flecks and a slightly rough feel. When you use smart blanching methods, you make skin removal easier and give your blender a cleaner job. You’ll notice the difference right away. The mix looks silkier, smells richer, and feels more like the spread you want to share.
- Pour hot water over nuts, then rub off loosened skins.
- Use pre-blanched nuts when you want less prep.
- Skip skins on almonds, hazelnuts, or peanuts for the creamiest finish.
If a few skins stay on, don’t worry. You’re still on the path to a smooth, cozy batch that feels homemade and welcoming.
Add Oil Slowly
A little oil can save the day whenever your nut butter feels stubborn, dry, or crumbly, and you only need to add it slowly to keep the texture just right.
You aren’t fixing a mistake; you’re guiding the blend toward the creamy finish everyone wants.
Drizzle in a teaspoon at a time, then let the blender work before you decide on more.
That oil drizzle control keeps you from crossing into greasy territory.
If the mixture still looks thick, stop and scrape the sides, then blend again for careful texture adjustment.
Use a neutral oil like avocado oil so the flavor stays friendly and familiar.
Keep going until the butter turns glossy and smooth, and you’ll have a finish that feels polished and ready to serve.
Flavor Ideas for Homemade Nut Butter
You can make homemade nut butter feel brand new with a few simple flavor tweaks, and the best part is that you control every bite. Start with small add-ins so you can taste the change as you go. A little salt sharpens the nut flavor, while a spoon of honey or vanilla maple adds gentle sweetness. For cozy comfort, try a cinnamon swirl. It can bring to mind fresh toast at home.
- Stir in cinnamon for warmth
- Blend in vanilla maple for a soft, sweet finish
- Add a pinch of salt to brighten everything
If you want your jar to feel like your signature spread, mix in spices after the butter turns smooth. Then you’ll make something that tastes like it belongs right in your kitchen.
Fix Grainy or Dry Nut Butter
Should your nut butter look grainy or feel too stiff, don’t give up yet. It usually needs a little more time in the blender. Stop the blender, scrape down the sides, and blend again in short bursts.
As the nuts warm and release more oil, the mixture should turn smoother. If it still seems dry, add a tiny splash of neutral oil, then blend until it loosens. Add salt or a touch of honey only after the paste starts to smooth out, so the flavor stays balanced.
Keep the batch moving, and don’t pack in too many nuts at once. With a few careful passes, you can turn a stubborn crumbly mix into creamy, spreadable nut butter.
Store Homemade Nut Butter Safely
Once your nut butter is smooth and ready, transfer it to an airtight jar or container right away so it stays fresh and easy to use.
Good airtight storage keeps out air, moisture, and stray fridge odors, so your batch stays where it belongs in your kitchen, not forgotten on a shelf.
For safer refrigeration, chill it if you want it to last longer, especially if you skipped stabilizers.
- Label the jar with the date.
- Keep the lid tight after each scoop.
- Let chilled butter sit for 15 to 30 minutes before spreading.
At room temperature, use it within 1 to 2 weeks. In the fridge, it usually keeps for 2 to 3 weeks. If it smells off or tastes bitter, trust your judgment and discard it.
Ways to Use Blender Nut Butter
Now that your blender nut butter is packed and stored, it’s time to enjoy it in ways that make your day easier and tastier.
Spread it on toast, swirl it into oatmeal, or spoon it into yogurt for a comforting, filling breakfast. If you pack lunch, tuck it into sandwiches, rice cakes, or celery sticks for a quick option.
When cravings hit, use it as a dessert topping over apples, pancakes, brownies, or ice cream. You can also blend it into smoothies, stir it into sauces, or mix it with honey for a simple dip.
Because you made it yourself, you get a snack that suits your taste and feels satisfying.
Frequently Asked Questions
Can I Make Nut Butter Without Roasting the Nuts?
Yes, you can use raw nuts and still make nut butter. Roasting enhances flavor and helps the nuts blend faster, but raw nuts work too if you blend patiently, scrape the sides often, and allow the oils to release.
What if My Blender Gets Too Hot While Mixing?
Stop blending and let your blender cool before resuming in short bursts. To prevent overheating and keep blending safe, use smaller batches, scrape often, and pause if it smells hot. This helps keep your nut butter smooth and safe.
Should I Add Sweetener Before or After Blending?
Add sweetener after the nuts start turning creamy so you can adjust the timing and flavor more easily. This helps create a smoother texture and prevents the sweetener from overpowering the nut’s natural taste.
How Do I Know When Nut Butter Is Fully Done?
You’ll know it’s done when it turns creamy, spreadable, and glossy, usually after 1 to 15 minutes. Check the texture, and look for oil release, which shows the nuts’ natural oils have fully blended.
Can I Freeze Homemade Nut Butter for Later Use?
Yes, you can freeze homemade nut butter for later use, and it stores well in the freezer. After thawing, the texture may soften or separate a little, so stir it thoroughly before spreading.