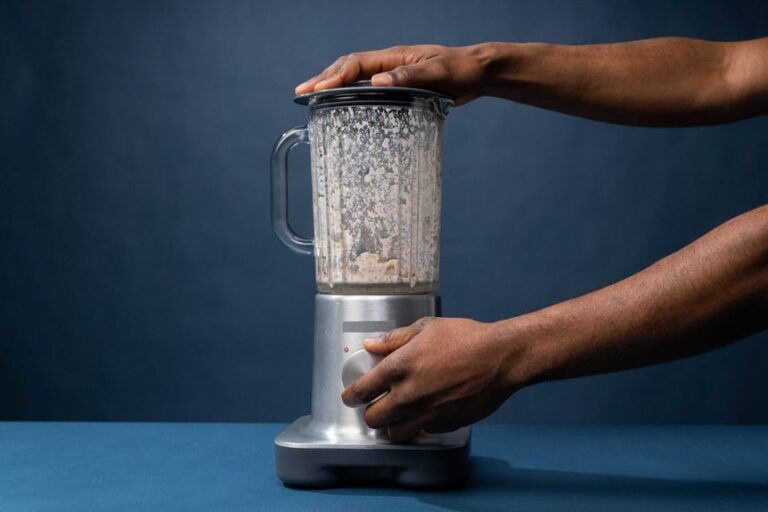

A blender that shakes hard often starts with a small mismatch you may not notice, such as a jar that looks seated but is not fully locked in place. You may also have a slippery counter, loose parts, or ingredients piled unevenly to one side, and each one can turn a quick blend into a small kitchen earthquake. Before you blame the motor, check a few simple spots first, because the real cause is usually easier to fix than it seems.
Why Is My Blender Shaking Excessively?
When your blender starts shaking hard, the cause is usually something simple at first, such as an uneven countertop, a jar that isn’t seated correctly, or a dirty base that can’t grip well. You aren’t alone if this happens, and most fixes start with the outside, not the motor.
Check that the feet sit flat and that the jar locks in fully. A loose lid or worn gasket can also add wobble.
If the shaking continues after that, look for blade damage, bent parts, or motor wear inside the unit. Those sources of vibration can make the blender feel unstable even if you did nothing wrong.
With a quick, careful check, you can often find the problem fast and get back to blending with confidence.
Check for Uneven Ingredients
Uneven ingredients can make your blender shake more than you’d expect, especially when the load sits heavy on one side of the jar. You can help by checking ingredient distribution before you blend. When one chunk stays stuck near the blade, the jar can wobble and make a texture imbalance feel worse than it is. Try these quick checks:
- Add soft items around the edges.
- Break up frozen pieces before starting.
- Pour liquids in first so solids settle evenly.
- Stop and stir if you see a pile forming.
That small reset helps you feel more in control, and it gives your blender a fairer mix to work with.
Balance the Blender Jar
A well balanced jar can make a big difference whenever your blender starts to shake, especially after you have already checked how the ingredients are sitting inside it.
First, set the jar straight on the base and listen for a clean click or snug fit. That small moment matters because jar balance depends on proper seating alignment, not just tight parts. Next, wipe away any food film, liquid, or crumbs from the jar bottom and the base ring, since even a tiny buildup can throw things off. If the jar rocks when you press it lightly, lift it off and place it again. You want it to sit evenly and feel steady.
When everything lines up, your blender feels calmer, and so do you.
Inspect the Blades for Damage
Check the blades for cracks, dents, or bends, because even small damage can throw the whole jar off balance.
You may also notice rough spots or a slight wobble while you spin the blades by hand.
If anything looks off, stop using the blender until you replace the damaged part.
Check For Cracks
As your blender starts shaking harder than it should, cracked or damaged blades are one of the first things you should inspect. A quick crack check can prevent bigger problems and help you regain confidence in the appliance. Look closely at the blade edges, the hub, and the jar for fractures, because even small splits can throw the whole assembly off balance.
- Unplug the blender first.
- Remove the jar and wipe it clean.
- Hold the blade assembly under bright light.
- Replace any part that looks chipped, bent, or split.
If you spot damage, don’t keep blending and hoping for the best. A blender should feel steady and safe, and a fresh blade assembly often restores that reliability quickly.
Look For Dents
Should the blade pass the crack test, the next thing to look for is dents, because even a small dent can throw the blade off balance and make your blender shake like it’s trying to escape the counter.
You can usually spot damage by slowly turning the blade and checking for bends, flat spots, or jar dents near the edges. Also inspect container dents, since a warped container can push the blade out of line and add extra wobble. If you see any nicked or dented metal, don’t keep using it. Replace the damaged part so your blender can run smoothly again. That one fix can make blending feel calmer, safer, and a lot less stressful for you.
Make Sure the Blender Is Seated Properly
A blender shakes less when it sits flat and steady on the counter. A stable setup gives the base the grip it needs to stay in place. If yours wobbles, you aren’t alone. Small setup issues happen in many kitchens. Check the jar seating and alignment so the jar locks in fully and doesn’t tilt.
- Place the blender on a level, hard surface.
- Wipe away crumbs or moisture from under the feet.
- Set the jar down until it clicks or rests evenly.
- Make sure the jar sits straight before you start.
When everything lines up, the blender shares the load better and runs more smoothly. That small amount of care helps you blend with more confidence and less rattling.
Check the Base, Coupling, and Lid Seal
Next, check the base, coupling, and lid seal for anything loose, dirty, or cracked. A wobbly base or a damaged seal can make the blender shake more than it should.
When the parts don’t sit snugly, you’ll notice the extra movement right away.
Base Stability Check
Start with the blender on a flat, steady countertop because an uneven surface can turn a small wobble into a full body shake. You want a setup that feels solid, so check the base before you blame the motor.
- Wipe the feet and counter to improve countertop grip.
- Press the blender down and see whether it rocks or slides.
- Try anti vibration pads if your counter is slick or thin.
- Move the blender off warped or damaged surfaces that flex.
If the base still feels loose, check that the jar sits squarely on the drive area. A crooked fit can pass extra shake into the whole unit. Small fixes like these often calm the blender fast, and they help you feel back in control.
Coupling And Lid Seal
If your blender still shakes after you have checked the counter, look closely at the parts that connect everything together. Inspect the coupling and lid seal next. A loose coupling can slip, buzz, or show wear, which throws the jar off balance. Check that the lid fits flat and that the seal remains secure, because a warped seal can let ingredients move unevenly. Use this quick guide:
| Part | What to check | What it means |
|---|---|---|
| Coupling | Cracks or wobble | Wear or poor grip |
| Lid | Tight fit | Better control |
| Seal | Even edge | Strong seal integrity |
| Sound | Grinding or chatter | Part mismatch |
If you spot damage, replace the worn part before the shaking gets worse.
Rule Out a Motor Problem
A shaky blender doesn’t always mean the motor is failing, but a motor problem can be the real reason the whole machine feels like it’s trying to dance off the counter.
When you have already checked the jar and base, look deeper. You aren’t alone if this feels tricky.
- Listen for a low hum, grinding, or a burnt smell.
- Feel for heat after a short run.
- Watch for slow starts or sudden speed drops.
- Notice shaking that continues even with an empty jar.
Those signs can point to motor bearings or internal wear inside the housing.
If the motor is straining, it can shake the whole unit no matter how carefully you set it up.
At that point, stop using it and call for service. You deserve a blender that feels steady and safe in your kitchen.
Adjust the Load and Liquid Level
Whenever your blender shakes, the load is often the first thing to check, because too much food or too little liquid can throw the whole mix off balance. You aren’t doing anything wrong; your blender just needs a more even mix. Start with ingredient layering: pour in liquid first, then soft items, and add frozen or dense pieces last. That helps the blades catch smoothly.
Next, watch the liquid ratio. If the blend looks dry, add a little more liquid and pulse again. Also, keep batches smaller when you’re working with nuts, ice, or thick fruit. A lighter load eases strain and reduces shaking quickly.
When you balance the jar well, you give your blender a steadier, more consistent job.
Try the Blender on a Level Countertop
Now that you have checked the load, look at the surface under your blender. A shaky counter can make even a well filled jar act wildly. If the unit sits on a sloped or bouncy spot, vibration will increase quickly. Move it to a flat, solid countertop and test it again. A clean base also helps the blender grip, since crumbs, grease, or moisture can reduce surface friction.
- Press the feet down and make sure they touch evenly.
- Wipe the counter and the blender base dry.
- Try a different spot if the first one still wobbles.
- Use a firm mat only if it stays steady.
When the surface feels stable, your blender gets the support it needs, and the whole kitchen feels calmer too.
Tighten Loose Blender Parts
Loose parts can make your blender shake harder than it should, so start by checking the base mounts and making sure everything sits snugly.
Then secure the blade assembly and look for any play in the jar or retaining nut.
If the jar looks tilted or doesn’t lock in cleanly, realign it before you blend again.
Check Base Mounts
A shaky blender often starts with the base, so check the mounts before you blame the motor. You should inspect the unit closely, and this quick check can save you stress. Look under the blender and feel for loose mounts, cracked feet, or a wobbly frame. Then clean the bottom so grime doesn’t block vibration isolation and make the unit slide.
- Set it on a flat counter.
- Press each foot and test for give.
- Tighten any loose screws you can reach.
- Replace damaged pads or feet.
If the base still shifts, stop and inspect the surface again. Small changes here can reduce the shake and help your blender feel steady, safe, and ready for your next mix.
Secure Blade Assembly
If the base feels steady but your blender still shakes, the blade assembly is the next place to check. Unplug it, then twist off the jar and inspect the blade fastening and retaining nut. If either feels loose, hand-tighten it until snug, but don’t force it. You want firm contact, not a jammed part.
Next, spin the blades by hand. They should move smoothly without side wobble or scraping. If they feel rough, bent, or uneven, the assembly may need replacement.
Also, check the gasket for wear, because a worn seal can throw off balance and make the machine vibrate. When each part stays secure, your blender can settle down and work properly.
Inspect Jar Alignment
While the base may look fine, if your blender still shakes, the jar itself may not be sitting quite right. You aren’t alone in this, and a small jar alignment issue can cause a big mess. Check the seating position first, because a jar that rests crooked can wobble hard at high speed.
- Lift the jar off and place it back firmly.
- Make sure the locking tabs or grooves click into place.
- Wipe away residue on the base, jar, and seal.
- Tighten loose blender parts manually, but don’t force them.
If the jar still rocks, inspect the gasket, blade ring, and retaining nut. Even a tiny tilt can throw off balance and make your blend sound like it’s auditioning for a drum solo.
Signs Your Blender Needs Repair
You can usually tell your blender needs repair when the shaking stops feeling normal and starts acting like a warning sign. If you hear grinding, smell hot plastic, or see the jar move across the counter, do not ignore it. Those motor symptoms often mean the drive system is struggling, and bearing wear can make the whole unit shudder even when the base looks fine.
| Sign | What it may mean |
|---|---|
| Loud rattle | Loose parts or blade damage |
| Burnt odor | Motor strain |
| Side to side wobble | Internal wear |
When these problems keep showing up after you have checked alignment, you are not being dramatic. Your blender is asking for help, and you deserve equipment that feels safe, steady, and reliable in your kitchen.
Prevent Blender Shaking in the Future
A little care now can save you from a noisy blender later. You can keep your blender steady by building simple routines that your kitchen crew can share:
- Put it on a flat, dry counter.
- Clean the base, feet, jar, and seals regularly.
- Store the jar, blade area, and cord in ways that protect them.
- Check that parts seat properly before you blend.
When you treat your blender well, it feels less fussy and works with you. Load it in the right order, keep ingredients balanced, and avoid overfilling the jar.
Also, dry every part before you put it away. That small step helps with grip, reduces wobble, and keeps your space ready for the next smoothie.
Repair or Replace Your Blender
When your blender still shakes after you have cleaned it, leveled it, and loaded it correctly, the problem may be deeper than routine use. You may be dealing with worn blades, loose parts, or a failing motor.
Start by checking the jar, gasket, and base for cracks or looseness. If you hear grinding or notice wobble by hand, that’s a clear warning sign.
In many cases, professional repair can save a good machine, especially if the motor still runs well. But if the frame is damaged or the repair cost is close to the price of a new unit, replacement makes more sense.
Use your judgment. You want a blender that feels steady, safe, and ready to work with you, not against you.
Frequently Asked Questions
Can a Warped Countertop Cause Blender Shaking?
Yes, a warped countertop can absolutely make your blender shake. You need a level, stable surface because even a slight tilt can amplify vibration. Place the blender on a flat, solid spot.
Do Anti-Vibration Pads Always Help Reduce Blender Movement?
No, anti-vibration pads do not always help. Their effectiveness depends on the surface and the pad material, and a soft pad can actually make wobbling worse. You will usually get better results on a flat, clean counter with firm support.
Why Does My Blender Shake More With Frozen Ingredients?
Frozen ingredients make your blender shake more because the load becomes uneven and the ingredients can bridge around the blades, disrupting smooth movement. You may feel more vibration as dense chunks resist flow; adding liquid first and pulsing the blender can help smooth things out.
Should I Hand-Tighten the Jar Instead of Over-Tightening It?
Yes, you should hand-tighten the jar instead of over-tightening it. You’ll protect seals, improve alignment, and reduce shake. Try checking for jar sealing issues and lid alignment, so you can feel confident and included.
When Is Blender Shaking a Sign of Bearing Wear?
You should suspect bearing wear if your blender still shakes with bearing noise, motor wobble, or grinding after you have checked the jar, base, and load. If the vibration continues, repair or replacement is likely needed.