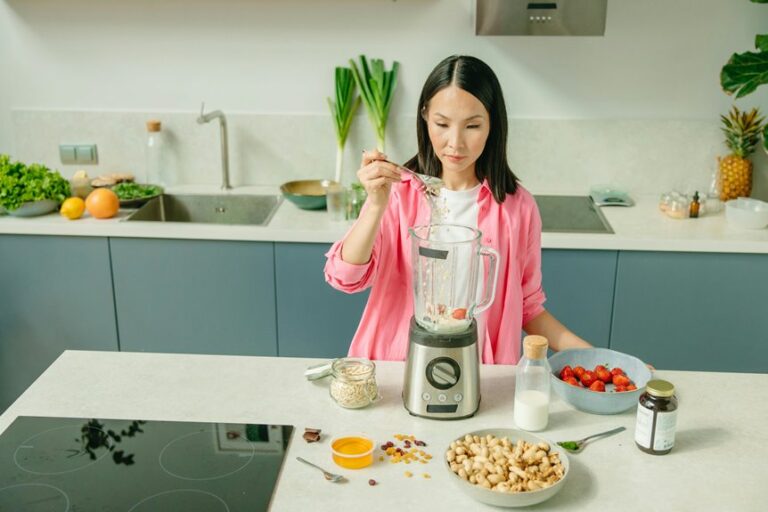
A blender can turn a simple bag of peanuts into a silky spread faster than you might expect, but only if you use it correctly. You will get the best results with dry-roasted peanuts, a strong motor, and a little patience. Start slowly, scrape the sides, and watch the mixture change from crumbs to paste to butter. If it becomes stubborn, there is a practical fix that can save the batch.
Yes, You Can Blend Peanut Butter
Yes, you can blend peanut butter in a blender, and a strong one makes the task much easier. If the idea seems tricky, you aren’t alone, but homemade peanut butter is achievable with basic blender use and a little patience.
Start with dry-roasted peanuts, then let the blades break them down step by step. You’ll first see crumbs, then a thick paste, and finally a smooth spread. When the mixture clings to the sides, stop and scrape it down. That brief pause helps everything move again.
Keep blending until the texture looks creamy and rich. With a steady pace, you can make a batch that tastes fresh, feels satisfying, and gives you the reward of making it yourself at home.
Best Blender Features for Peanut Butter
Whenever you make peanut butter in a blender, the right features can make the process feel easy instead of frustrating.
You need a powerful motor that can handle thick, sticky peanuts without quitting halfway. Variable speed control also helps, because you can start slow and then raise the speed as the nuts break down. A sturdy jar matters too, since it keeps everything steady when the mixture gets heavy.
Look for sharp blades that stay strong under pressure, and a lid with a secure fit so you can use the blender with confidence. If your blender includes a tamper, that’s a bonus because it helps move peanuts toward the blades. With these features, you can make homemade peanut butter with less stress.
How to Blend Peanut Butter Smoothly
To get peanut butter smooth, you need a blender that can handle thick, sticky peanuts without stalling. Start at a low speed, then increase it so the nuts break down evenly.
When the mixture clings to the sides, stop and scrape it down, because that small step can make a big difference in the final texture.
Choosing The Right Blender
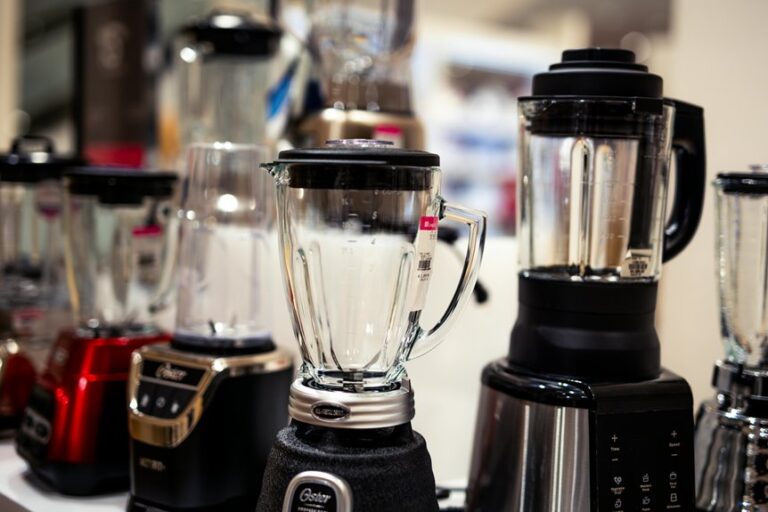
A high powered blender can make peanut butter smooth and creamy, but not every blender is up for the job. You want strong motor power and a jar size that keeps the peanuts moving instead of packing down.
- Pick a blender with at least 1000 watts.
- Choose a wide jar for better circulation.
- Use a sturdy blade assembly.
- Avoid tiny containers that trap crumbs.
- Look for a tamper friendly lid.
When your blender fits the task, you feel less stuck and more in control. That matters when you’re making something homemade for your kitchen crowd.
A solid machine helps you turn dry peanuts into a silky spread without drama. Check the specs first, then trust the blender that can keep up with you.
Smooth Blending Technique
Now that you have the right blender, the real magic comes from how you use it. Start low, then raise the speed as the peanuts break up. This keeps the blades moving and helps you build a smooth texture without stressing the motor. Whenever the mix clings to the sides, stop and scrape so every bit joins the blend. A tamper can also keep things flowing. Use this simple rhythm:
| Step | What you do |
|---|---|
| 1 | Add dry roasted peanuts |
| 2 | Blend on low initially |
| 3 | Scrape sides as needed |
| 4 | Increase speed slowly |
| 5 | Stop whenever you get an even consistency |
You will see crumbs turn to paste, then creamy peanut butter. If it feels warm, do not worry. It firms up later.
How to Thin Peanut Butter in a Blender
When your peanut butter feels too thick in the blender, you can thin it out with a few simple steps without ruining the texture. You aren’t stuck, and a small oil adjustment can bring back the smooth flow you want.
- Stop the blender and scrape the sides.
- Add 1 teaspoon of oil at a time.
- Blend in short bursts.
- Check the texture after each pause.
- Keep the batch moving with the tamper.
This texture rescue works best when you stay patient and add only a little liquid. When it still grips the blades, pause again and let the mix settle. You’ll get closer to a spread that feels right in your kitchen. Keep the lid on tight, and trust the process. Your batch can turn creamy without losing that rich, nutty body.
What Mixes Well With Peanut Butter
Once your peanut butter reaches the right thickness, it becomes a versatile base for many flavors and snacks. You can stir it into oatmeal for a cozy bowl, spread it on toast with banana slices, or dip apple wedges for a quick treat. It also pairs well with yogurt, celery, and crackers when you want something simple but satisfying.
If you prefer sweeter options, try a honey swirl for gentle warmth or a chocolate drizzle for a richer bite. You can also blend it into smoothies, muffins, or energy bites to create easy, familiar food. A little salt helps the flavor stand out, and a few mix-ins can make the snack feel more personal.
Signs Your Blender Is Struggling
A blender that’s having trouble usually shows it quickly, and those clues matter because peanut butter gets thick before it gets smooth.
You aren’t alone if yours groans a little, but motor strain indicators can help you spot trouble promptly. Watch for these signs:
- The blade slows instead of pulling peanuts down.
- The motor whines or sounds rough.
- The jar feels hot fast.
- The smell turns warm or sharp.
- You see overheating warning signs such as sudden pauses or smoke.
When you notice these, your blender needs a break. That doesn’t mean you failed. It just means the machine needs more help than your batch can provide.
Tips for Making Peanut Butter at Home
Because peanut butter thickens quickly, the best results come from a calm, steady pace and a few simple habits. Start with dry-roasted peanuts and blend small batches so the blades keep moving. Scrape the sides often, then pause whenever the mixture clumps, because a short break can help protect your motor and improve the texture.
Add salt near the end, a little at a time, so you can taste and adjust without adding too much. If you want a smoother finish, keep blending until the peanuts release their oil and the paste turns glossy. For storage, transfer the finished spread to a clean jar, then chill it if you prefer a firmer texture. This keeps the process manageable and helps your peanut butter stay easy to share.
How to Add Crunchy Mix-Ins Safely
You can add crunch without wrecking the smooth base by using firm mix-ins like chopped peanuts or cacao nibs.
Stir them in after the peanut butter is fully blended so the texture stays even and easy to control. If you want a little more crunch, pulse only a few times instead of blending nonstop, or you’ll turn those bits into dust.
Choose Firm Mix-Ins
Often, the best crunchy peanut butter starts with the right mix-ins, and firm add-ins give you texture without turning the batch into a mushy mess.
When you choose firm add-ins, you protect the stable texture you worked for in the blender.
- Choose dry roasted peanuts for the cleanest crunch
- Use chopped nuts that stay chunky
- Pick seeds that won’t dissolve fast
- Avoid soft fruit or sticky candy
- Keep pieces small enough to spread well
You will feel more confident when every bite has a little snap. If you want extra variety, mix in ingredients that hold their shape and don’t soak up oil too quickly. That way, your peanut butter stays balanced, familiar, and easy to share.
Add After Blending
After the peanut butter turns smooth, stir in your crunchy mix-ins slowly so the texture stays balanced and spreadable. You’ll feel more in control when you add chopped peanuts, seeds, or cocoa nibs after blending, because they won’t get crushed into dust.
Use a spoon or spatula, then fold gently from the bottom up. This keeps the spread familiar and inviting, like something made for your kitchen crew.
If you want a little sweetness, add post blend sweeteners in small amounts and taste as you go. For extra depth, finish with finishing flavor boosts like cinnamon, vanilla, or a pinch of salt.
Then mix just enough to combine, so every bite stays pleasantly crisp and shared with ease.
Pulse Briefly Only
A quick pulse is the safest way to add crunchy mix-ins without turning them into dust. When you stir in peanuts, chocolate bits, or seeds, use brief pulse control so you stay in charge. Short motor bursts keep the pieces whole and help you preserve the texture you want.
- Stop as soon as the mix-ins move
- Scrape the sides if bits stick
- Use small handfuls for better flow
- Check texture after each burst
- Keep the lid on tight
You don’t need a long blend here. Just a few taps will fold the crunch in gently, and your peanut butter keeps its lively texture. That way, you get the bite you want without losing the homemade feel.
How to Clean Peanut Butter From a Blender
When peanut butter sticks to your blender, cleanup is usually simpler than it looks. Fill the jar halfway with warm water and add a drop of dish soap, then run the blender for 20 seconds. This helps loosen the thick residue from the blades and inside walls. Pour out the mixture and rinse the jar well. If a sticky film remains, use a soft sponge or bottle brush to clean the inside. For stubborn spots, let the container soak for a few minutes, then rinse again. Dry each part thoroughly before storing it so it’s ready for your next use.
Common Peanut Butter Blending Mistakes
You can run into trouble quickly if you overfill the blender, because the peanuts need room to move and break down evenly.
Skipping liquid additions can also cause problems, since a little oil or another add in sometimes helps the mixture come together and turn smooth.
If you miss either of those steps, you could end up with stuck crumbs, a strained motor, and a batch of peanut butter that feels more frustrating than fun.
Overfilling The Blender
Too many peanuts in the blender can turn a simple batch of peanut butter into a stubborn, smoky workout for your motor. You don’t need to fill the jar to make homemade peanut butter. Start with a small amount, respect your batch size limits, and check the blender capacity before you begin. That brief pause protects both your texture and your machine.
- Leave space for movement.
- Keep the lid secure.
- Blend in stages.
- Watch the peanut level.
- Stop when the mixture stalls.
When the peanuts have room to move, they spin, break down, and turn creamy with less strain. If you overfill the blender, the peanuts pack together and resist the blades. A smaller batch is easier, faster, and less stressful for you.
Skipping Liquid Additions
A small batch can still stall out whenever the ingredients stay dry, and that’s where many peanut butter makers get stuck. You may want to add water or milk, but skip that urge. In dry peanut blending, the nuts need friction so their natural oils can release. If you pour in liquid too soon, you can slow that process and get a gritty mix instead of a smooth spread.
Keep blending, scrape the sides, and let the blades do their work. If you want an oil free texture, patience helps more than extra ingredients. Warmth, not moisture, usually fixes a thick batch. Stay with it, trust the process, and you’ll move from crumbs to creamy with less mess and more confidence.
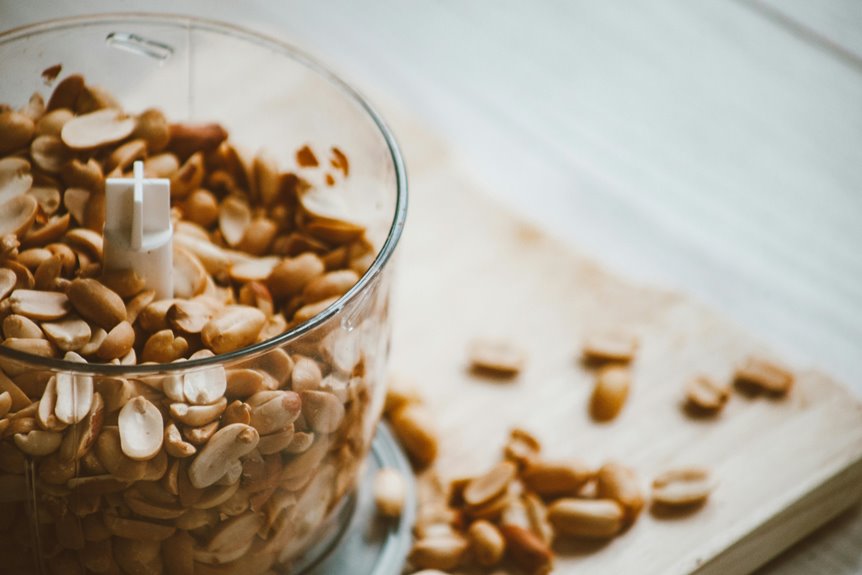
When a Food Processor Works Better
When the peanuts keep sticking, clumping, or refusing to move, a food processor often works better than a blender. You get steadier mixing, fewer interruptions, and less frustration. In the processor versus blender choice, the processor is the better option if you want more control and a safer pace. It also handles batch size limits better, so you can make enough for the whole week without crowding the bowl.
- The wider bowl keeps peanuts moving.
- The blade reaches sticky bits faster.
- You can scrape less often.
- The motor feels less strained.
- You get a thicker, even spread sooner.
If you’re making peanut butter for friends or family, that extra ease can feel like a real advantage.
Frequently Asked Questions
Can You Make Peanut Butter From Raw Peanuts?
Yes, you can make peanut butter from raw peanuts, but for the best flavor, roast them first. Then blend patiently, scrape the sides often, and stop before overheating for a smooth, creamy result.
How Long Does Homemade Peanut Butter Last?
Homemade peanut butter usually lasts about 2 to 4 weeks at room temperature, or 3 to 6 months in the refrigerator. Watch for spoilage signs like a rancid smell, mold, or separation. Refrigerating it helps extend its shelf life.
Can You Use a Regular Blender for Small Batches?
Yes, you can use a regular blender for small batches if you respect its size limits. You will get better batch consistency by blending slowly, scraping often, and pausing before it overheats.
Does Homemade Peanut Butter Need Refrigeration?
No, you do not always need refrigeration; homemade peanut butter can be kept at room temperature for short-term storage. For longer freshness, refrigerate it.
Is Homemade Peanut Butter Healthier Than Store-Bought?
Usually, yes. Homemade peanut butter is often the healthier choice because you control the ingredients and can make a better nutrition comparison. You can skip added sugar, oils, and salt, so you know exactly what you are eating.