Frozen fruit can turn a calm smoothie task into a noisy test for your blender, but you do not have to risk a burned-out motor or dull blades. When you choose the right machine, prepare the fruit properly, and use the pulse setting with a little liquid, you make the job much easier. The key is knowing how much to add and when to pause, because that is where most damage begins, and that is exactly what comes next.
Why Frozen Fruit Stresses Your Blender
Upon tossing hard frozen fruit into a blender, you ask the machine to do a lot at once. The fruit stays stubborn, so the blades meet extra resistance and can’t spin freely. That drag makes the motor work harder, and if you keep pushing, motor overload can creep in. You might hear a strained hum, and the jar may shake as the fruit clumps together.
Even sharp blades can’t fully escape the stress when dense chunks hit them all at once. As a result, your blender feels less like a helper and more like a tired teammate. When you understand this pressure, you can treat the machine with more care and keep your smoothie routine smoother.
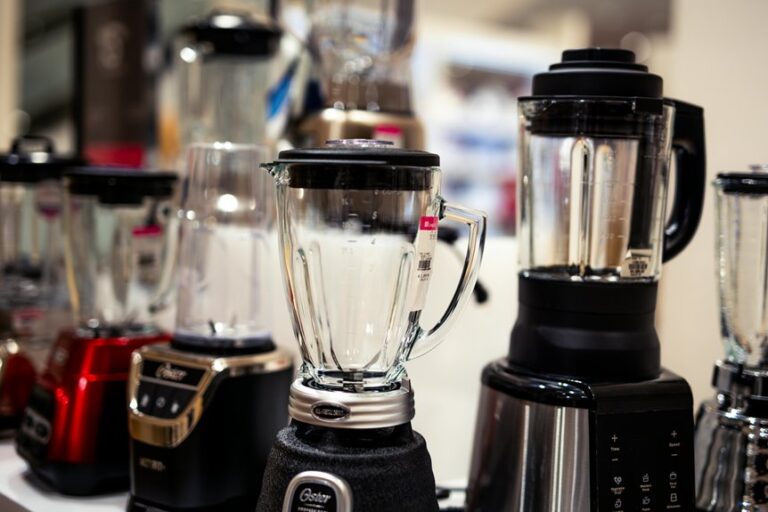
Choose the Right Blender for Frozen Fruit
The best way to protect your blender starts with choosing the right one. You want strong blending power and a model that can handle frozen fruit without strain. When you choose well, you can make smoothies with less stress and more confidence.
- Look for a motor built for ice crushing.
- Pick sturdy metal or hardened blades.
- Choose a jar that stays steady on the base.
- Check for a tamper and speed controls.
A cheap unit might work for soft fruit, but frozen chunks can wear it down quickly. If you blend often, choose a model made for frozen ingredients. That choice helps you work more efficiently and makes your kitchen routine easier.
Prep Frozen Fruit Before Blending
Before you blend, let your fruit soften for 5 to 10 minutes if it feels rock hard, so your blender doesn’t have to work through every piece at once.
Cut large fruit into smaller pieces, and remove any big ice clumps that could jam the blades.
These small prep steps help the fruit move more easily and keep your smoothie from turning into a stubborn frozen block.
Thaw Slightly First
Whenever your blender struggles with frozen fruit, a short thaw can help. You don’t need to let the fruit turn mushy. A brief partial thaw is enough to soften the edges and reduce strain on the jar. That small pause makes blending easier and more reliable.
- Set the fruit out for 5 to 10 minutes.
- Use refrigerator thawing when you want more control.
- Keep the fruit cold, not warm, so it stays fresh.
- Blend as soon as the pieces begin to yield when pressed.
This simple step gives your blender more room to work and helps ensure smoother results.
Cut Fruit Smaller
Cutting frozen fruit into smaller pieces can save your blender from a lot of hard work.
When you prepare fruit before freezing, each blend becomes easier and safer.
Aim to cut chunks into 1 to 2 inch pieces so your blender doesn’t have to handle large, rocklike pieces all at once.
Smaller pieces also help the fruit move around the jar more easily, which supports a smoother blend.
Freeze the pieces in a single layer first so they’re less likely to stick together later.
Then store them in bags and pour out only what you need.
This simple habit gives you better control, less strain, and a more even blend every time.
Remove Large Ice Clumps
A few quick checks can save your blender a lot of stress. Before you load the jar, take a moment to remove ice chunks that may be hiding in the bag. Once you break up frozen clusters, you help the blades move more easily and reduce the chance of a loud jam. You aren’t being fussy, you’re being smart, and your blender will thank you.
- Tap the bag on the counter.
- Squeeze apart stuck fruit.
- Pick out hard ice bits.
- Keep pieces loose and separate.
Then add the fruit in stages so the mix stays easier on the motor. This small step helps your smoothie blend more smoothly, faster, and with less risk of stalling.
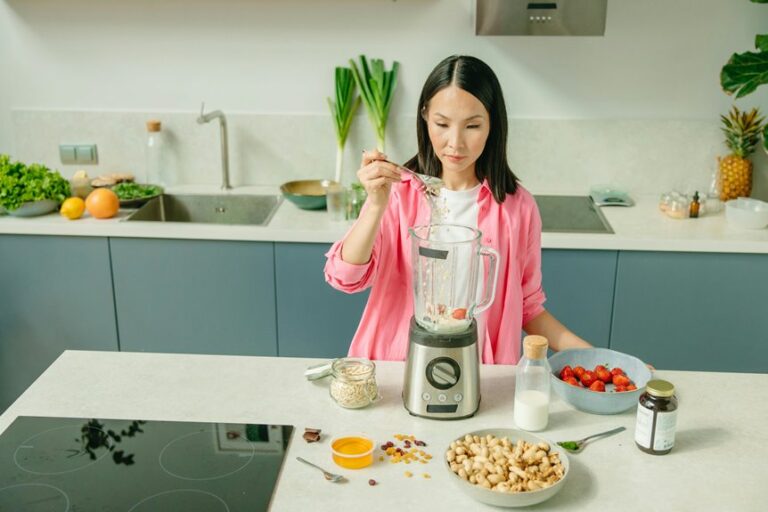
Add Liquid First
Start by pouring in the liquid base first, because it gives the frozen fruit a buffer layer to sit in.
That thin pool helps the blades catch and move instead of getting stuck on dense chunks.
As soon as the mix starts flowing, you’ll feel the blender work with you instead of against you.
Liquid Buffer Layer
With liquid in the jar at the start, you give frozen fruit a smoother path instead of asking the blades to force through a solid block. That’s liquid buffering, and it helps create better blade flow while keeping the blend calmer. You aren’t just adding juice or milk. You’re setting up the jar so the ingredients can settle without crowding the bottom.
- Pour in enough liquid to cover the blades.
- Add softer ingredients next for a gentler start.
- Add frozen fruit in small handfuls.
- Keep the mix moving with short pauses when needed.
This simple order helps you feel prepared rather than rushed. It also gives your blender a easier job, so you can blend with less stress and more confidence.
Smooth Blade Movement
Starting with liquid keeps frozen fruit from grinding against a dry jar and helps the blades spin freely from the start. You give the blades better clearance, so they can catch each piece without stalling.
Next, pour in enough liquid to cover the bottom, then add fruit on top. That setup encourages vortex flow, which pulls frozen chunks toward the center instead of pinning them to the sides.
If you hear the blender working too hard, stop and add a splash more. You aren’t being fussy. You’re helping the whole mix move efficiently.
With that smooth start, you protect the motor, reduce jams, and make each blend easier and safer.
Use the Pulse Setting First
When you’re blending frozen fruit, the pulse setting gives you a safe way to break up hard pieces before the motor has to work too hard. Use this pulse start strategy to keep control and protect your blender, especially when the jar feels packed with icy fruit. Short bursts help you hear what’s happening, so you can adjust quickly and avoid strain.
Try this burst control timing:
- Pulse two or three times.
- Stop and check for movement.
- Add more pulses only when needed.
- Switch to steady blending once the mix loosens.
You will feel more confident, and your smoothie routine won’t seem like a battle. A few smart taps can make the whole process smoother, calmer, and easier on your kitchen gear.
Blend Frozen Fruit in Small Batches
When you blend frozen fruit in small batches, you give the blender room to move and prevent the load from turning into a stubborn block of ice. You also protect the motor, since smaller portions are much easier to process than a jar packed full of frozen chunks.
Start with a modest handful, then add more only after the initial batch begins to loosen and blend smoothly.
Portion Control Basics
Start with small batches because a blender handles frozen fruit much better when it doesn’t have to fight a packed jar all at once.
- Measure your serving size first so you only blend what you need.
- When you’re scaling a recipe, cut the batch in half before you add more.
- Keep the fruit level low enough that the blades can catch each piece.
- Build around one smoothie, not a mountain of fruit, and you’ll feel in control.
When you portion this way, you stay in the same groove as other smoothie lovers. You also make cleanup easier and keep textures more even.
When you want extra, blend a second round instead of crowding the jar.
That small habit helps you work calmly and still get a thick, happy result.
Prevent Motor Strain
Small batches do more than keep your smoothie easy to manage. They also help protect your motor from strain. When you pack in too much frozen fruit, the blades work harder, and that can lead to motor overheating.
Instead, blend a little at a time so the load stays light and the motion stays steady. You’ll notice the blending duration gets shorter, too, because the fruit breaks down before the machine has to fight through a dense mass.
If the mix starts to drag, stop for a moment and let the blender rest. That small pause can save you from a loud, unhappy machine.
With this approach, you and your blender can stay in sync and keep smoothie time calm.
Smooth Batch Loading
Load your blender with care, and it will treat your frozen fruit much better. Small batches help you stay in control, and they keep the blades moving without a jam. As you consider batch size, aim for a handful of fruit at a time, not a packed jar. That’s how you protect the motor and still get a smooth sip.
- Add liquid first so the blades can catch it.
- Follow with softer fruit next.
- Add frozen pieces last, in short bursts.
- Stop and check whether the mixture stalls.
You will feel like part of a smarter smoothie crew once you load this way. It’s simple, and it saves stress for you and your blender.
Stop and Stir Between Blends
Whenever the blender sounds stuck or the fruit stops moving, pause for a moment and stir the mixture before you try again. That quick reset helps you and your blender work as a team. Whenever you see a need for air pocket recovery, lift the jar, tap it gently, and use manual jar repositioning so the fruit falls back toward the blades. Then restart on pulse for a short burst.
| Check | Action |
|---|---|
| Fruit jammed | Stir once |
| Air pocket forms | Tilt jar |
| Mixture stalls | Pause and reset |
| Pieces cling high | Reposition jar |
| Blend loosens | Pulse again |
These small stops keep you from forcing dense chunks. They also help your smoothie crew stay calm, steady, and ready for the next round.
Keep Your Blender Motor Cool
As you blend frozen fruit, the motor can heat up quickly, so your best approach is to keep the work short and controlled. You aren’t alone in this. Many home cooks face the same challenge. Use these motor cooling tips:
- Blend in quick bursts.
- Pause for 30 seconds between rounds.
- Watch for overheating warning signs, like a hot smell or slower blades.
- Let the base rest before you restart.
That small break helps your blender stay strong and keeps your smoothie routine on track.
When the jar feels warm, stop and give it time to cool. You’ll protect the motor, reduce strain, and make each batch easier.
A cool blender works with you, not against you, and that makes the whole kitchen flow smoother.
How Much Liquid Should You Add?
Start with a small amount of liquid, because frozen fruit needs room to move before it breaks down cleanly. You usually want enough to cover the blades and help the mixture circulate, but not so much that you lose body.
For liquid ratio basics, start with about 1 cup of liquid for 2 cups of frozen fruit, then watch how it flows. If the blender is running well but the blend still feels too thick, add a splash and pulse again.
When adjusting smoothie thickness, small changes matter more than large pours. Water, milk, almond milk, or juice all work, so choose the one that fits your taste. You aren’t aiming for perfection, just a smooth blend that feels right in the glass.
Fix a Stuck Blender
A stuck blender can feel annoying fast, but you can usually get it moving again without hurting the motor. First, switch it off and unplug it, then let it rest for a minute. Next, try these steps:
- Check for a packed load and remove a few frozen pieces.
- Use the jam release lever, if your model has one.
- Do a power cord reset by unplugging it for 30 seconds.
- Add a splash of liquid and pulse again.
If the jar still locks up, twist the blade base gently, never force it. Stay patient, because a small reset now can save the motor later.
Clean Your Blender After Frozen Fruit
Once you finish blending frozen fruit, clean the blender right away to keep the jar, blades, and lid in good condition. You’ll avoid sticky stains and the lingering berry smell nobody wants.
Rinse the parts with warm water, then add a drop of dish soap and blend briefly to lift residue. After that, wash each piece by hand, especially around the blade base where fruit can collect.
For deeper cleaning, soak the lid and gasket whenever they smell sweet or feel slick. Dry everything completely before storing it so moisture doesn’t remain. This simple routine supports blade maintenance and keeps your blender ready for the next smoothie.
Common Frozen Fruit Blending Mistakes
The biggest frozen fruit blending mistakes usually happen when you rush the process, but the good news is that they’re easy to fix. You aren’t alone if your smoothie turns chunky or your blender groans a little.
- You load too much at once, and ingredient overloading jams everything.
- You skip liquid first, so the blades can’t catch the fruit.
- You start on high speed, which makes the mix stall.
- You worry about blade wear myths, then ignore real strain from dense fruit.
Instead, keep batches small, add liquid first, and let the fruit move.
When you work this way, you’ll feel more in control, and your blender will give you smoother results and fewer strange noises.
Blend Frozen Fruit Safely Every Time
When you blend frozen fruit the right way, you protect your blender and still get the thick, cold texture you want.
Start with a liquid base, then add softer fruit before the frozen pieces. Use small batches, because crowded jars make the motor work too hard. Pulse at first, then switch to low speed, and move faster only when the mixture loosens.
If it stalls, stop and stir or shake the jar. For better blender safety, choose a high powered model or let harder fruit thaw for 5 minutes. You can also use a tamper to guide fruit toward the blades, which reduces the need to stop and restart the blender.
Frequently Asked Questions
Can I Blend Frozen Fruit Without Any Liquid?
Yes, but do not risk it. Without liquid, you will increase blade stress and motor strain. Add a splash, and you will blend more smoothly, safely, and with greater confidence.
Should I Thaw Fruit Before Freezing It Again?
No, you should not thaw fruit before freezing it again because food safety and texture quality can suffer. You will get better results by freezing it once in portions so your smoothies stay cold, smooth, and reliable.
What Frozen Fruits Blend Easiest in Smoothies?
Blueberries, bananas, mangoes, and strawberries blend easiest, giving you a smooth blueberry smoothie texture. For mangoes, add the liquid first, then the softer fruit, so your blender stays happy and your smoothie tastes great.
Can I Use a Food Processor Instead of a Blender?
Yes, you can, and many home cooks appreciate the appliance versatility. You’ll get a chunkier texture with a food processor, so use small batches and add liquid as needed. It works best when you want a thicker result, rather than a smooth smoothie-style blend.
Does Fruit Size Affect Blending Speed?
Yes, it does. Smaller fruit chunks blend faster because the blades can grab and move ingredients more easily. Larger pieces can exceed blade reach, which can increase strain. Keep fruit chunk sizes consistent for smoother results.