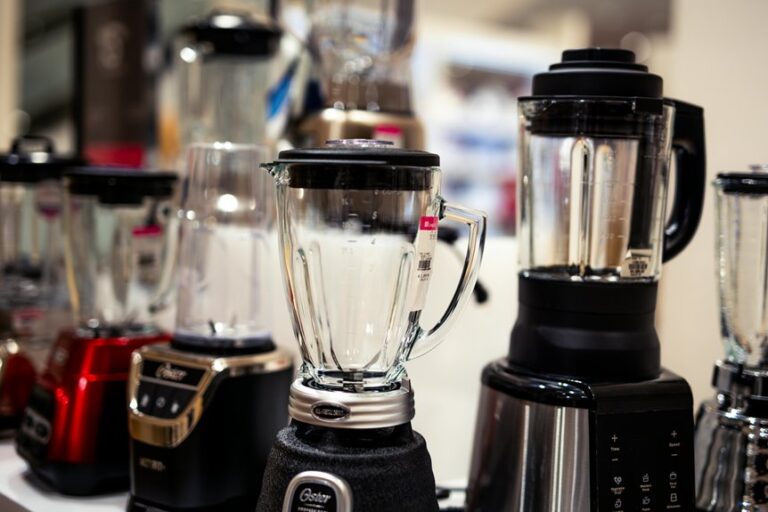

Could your blender blades really be sharpened, or are they simply coated with buildup that makes them seem dull? You will want to check that beforehand, because the answer changes what you do next. When the blades are just dirty, a careful cleaning can restore performance quickly. When they are truly worn, you can still improve them with the right approach, but only if you know how to handle the assembly safely.
How to Tell Blender Blades Are Dull
If your blender isn’t working like it used to, dull blades are often the cause. You may notice the motor straining, the jar sounding louder, and the base working harder than usual.
If the mixture stays chunky, or you keep seeing uneven blending, the blades may no longer be cutting cleanly. You may also see food circling around instead of breaking down, which can leave your smoothie partly smooth and partly stubborn.
Even soft fruit can take longer to blend, and that extra time tells you something is wrong. When your blender feels less like a kitchen helper and more like it needs a break, pay attention.
These signs often appear together, so you can catch the problem early and decide on your next step with confidence.
Check Blade Type, Damage, and Safety
Now that you can identify the signs of dull blades, the next step is to check what type of blade setup you have and whether it’s safe to work on.
- Do a quick blade inspection to see whether the blade is fixed, removable, or part of a sealed assembly.
- Look closely for bends, chips, rust, or loose fasteners, because damage can make sharpening unsafe.
- Follow safety precautions every time. Unplug the blender, keep your fingers clear, and use care around sharp edges.
If the blade looks cracked or badly worn, don’t continue. A blade that’s intact and secure gives you a better chance of safe sharpening later.
Clean the Blades and Remove Buildup
Before you sharpen anything, wash away every bit of food residue so the blade edge is clear and easy to inspect.
A warm soapy rinse helps loosen stuck on buildup, and a soft brush can reach the narrow spots near the metal edge.
When you clean it well, you give yourself a better chance of sharpening the right surface without grinding leftover residue into the blade.
Remove Food Residue
Food residue can hide in the blade base, around the gasket, and under the metal assembly, so cleaning it thoroughly is the first step in any sharpening work. You’ll feel more confident once you remove residue before touching the edge. First, unplug the blender and take apart the blade unit as your manual allows. Then:
- Rinse the parts in warm, soapy water.
- Use a soft brush to remove buildup from tight spots.
- Dry every piece completely so no moisture remains.
Once you clear away old puree or seeds, the blade can sit cleanly for the next step. That matters because a dirty base can hide wear and make the work seem harder than it is.
A clean start makes the whole job easier to manage.
Deep Clean Blade Edges
A careful deep clean does more than make the blades look nice. You help your blender cut better whenever you wash off clinging paste, then focus on removing concealed grime along the edges. Unplug it first, then take apart the blade assembly and rinse every groove with warm soapy water. Use a soft brush to clean blade joints, and dry each piece fully so moisture does not hide in the base.
| Spot | Why it matters |
|---|---|
| Edge line | Clears buildup |
| Under gasket | Stops funk |
| Joint gap | Frees movement |
| Blade face | Restores flow |
| Seal ring | Prevents leaks |
When you work slowly, you protect the bevel and keep your kitchen running. A clean edge lets sharpening tools meet metal, not old residue, and that makes your effort worthwhile.
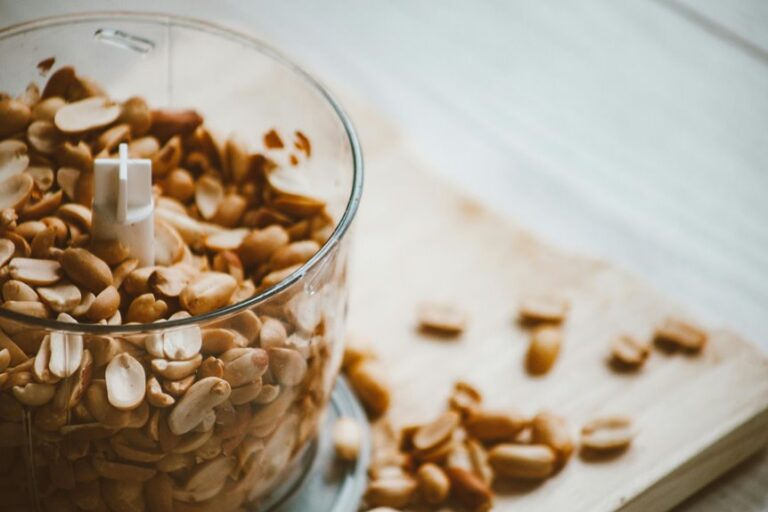
Test the Blades With Ice
Should you have heard that dropping ice into a blender can “sharpen” the blades, it’s smart to be a little cautious. Ice can help you spot weak performance, but it usually won’t fix a dull edge. You’re looking for signs, not miracles, and that’s okay.
- Try an ice cube crush test with a few cubes and a little water.
- Listen for smooth, even chopping instead of loud straining or slipping.
- Follow with a frozen fruit blend test to see whether the blades grab and move food well.
If the blender still leaves chunks, your blades may need real care. If it handles ice and fruit cleanly, you have a good result for now. Clean the jar after testing so residue doesn’t hide the result.
Sharpen Blender Blades by Hand
Should the ice test leave you with chunky results, you can still give your blender a real fix by sharpening the blades by hand.
First, unplug the blender and remove the blade assembly carefully. Wash and dry it well so you’re working on a clean edge. Then use manual honing methods with a whetstone, honing rod, or fine sandpaper, and maintain the correct blade angle by matching the original bevel. Use light pressure and move each blade evenly, without rushing. Check your progress often so you don’t remove too much metal. Once the edge feels better, reassemble everything tightly and test it with water.
Use Baking Soda as a Mild Abrasive
Baking soda can work as a very mild abrasive, but it helps only as a gentle cleaner, not a true blade sharpener. Mix it with a little water to make a baking soda paste, then use it for light cleaning around the blade area after you unplug the blender and remove the assembly. This can lift stuck-on grime that makes blades seem dull.
- Apply the paste with a soft cloth.
- Rub lightly so you don’t scratch the metal.
- Rinse well and dry every part fully.
Because you’re caring for your blender, not forcing it, this step can help the parts feel cleaner and ready. It won’t restore a worn edge, but it can support better blending by removing buildup that gets in the way.
Try Rice for a Gentle Touch-Up
Rice is a common DIY trick, and people often hope it will give dull blender blades a quick touch-up. You might hear the rice polish myth, but rice will not truly sharpen the metal. At best, it provides gentle grain abrasion that can remove a little residue. Still, that is not the same as restoring the beveled edge you rely on.
| What rice can do | What rice cannot do |
|---|---|
| Lightly clean stuck bits | Reset a worn blade edge |
| Offer mild rubbing action | Replace real sharpening |
| Seem simple and familiar | Deliver lasting results |
If you try it, use a small amount of dry rice and stop if you notice noise or wear. For better results, treat rice as a light cleaner, not a fix.
Use a Sharpening Stone Carefully
A sharpening stone can help restore your blender blades when they start to struggle, but you should use it with care so you don’t wear the edge down too far. A steady hand makes a real difference. Keep these steps in mind:
- Hold the blade at the factory bevel with solid stone angle control.
- Use light pressure so you only kiss the edge.
- Move each side evenly, then stop once the blade feels crisp again.
As you work, rinse away grit and check the edge often. If the stone starts to grab, ease up right away. That small pause protects the blade and keeps your sharpening job clean, safe, and kind to your blender.
Reassemble the Blender Blades
Once the blades are clean and sharpened, reassemble everything carefully so your blender stays safe and leak-free. Slide the blade assembly back into place the same way you removed it, then add each seal, ring, and fastener in the correct order. This careful reassembly helps keep the base steady and supports confident blending.
| Part | What to check |
|---|---|
| Seal | It should sit flat and not twist |
| Ring | It needs a snug, even fit |
| Fastener | Tighten it firmly, but do not force it |
As you work, keep your hands dry and steady. If something feels off, pause and realign it. That extra attention supports leak prevention and helps you return the tool to reliable use.
Test Blender Performance With Water
Next, add a small amount of water and run the blender for a few seconds.
Watch for a smooth vortex, steady speed, and even pulling at the center. When the water swirls cleanly without loud dragging or stalling, your blades are likely back in good shape.
Water Vortex Test
How can you tell whether your blender is really ready after sharpening? Fill the jar with water and watch the vortex form. A strong, centered spin shows a healthy flow pattern and tells you the blades are moving water well. If the water only sloshes or spins weakly, you may need to check the blade edge again.
- Use cold or room temperature water.
- Add only enough to cover the blades.
- Run it for a few seconds, then stop.
You aren’t chasing power here. You’re looking for a clean pull toward the center, with the water moving smoothly and evenly.
That small whirlpool can give you confidence, and it helps you feel part of the repair process instead of guessing.
Smoothness And Speed
A sharp blender shouldn’t just work, it should feel smooth and almost effortless when you test it with water.
Pour in enough water to cover the blades, then run the machine at low and high settings. Listen for motor smoothness, not strain, rattle, or shaky starts. A healthy blender should ramp up quickly and maintain a steady blend speed without pulsing too much. If the water swirls cleanly and the jar stays stable, you’re close to a good edge.
If it sounds rough, pause and check the blade fit, seals, and reassembly. These small signs matter. When the motion feels calm and even, your sharpening work is doing its job.
When to Replace Blender Blades
Even though you can sharpen blender blades at home, there comes a point when replacement makes more sense. You’ll know the timing is right when food stays chunky, the edge looks chipped, or rust won’t wash away. If you hear new rattles, smell a hot odor, or notice weak spinning, those worn motor signals may mean the whole assembly is tired.
- Replace blades if the edge is bent or nicked.
- Replace them if the seal no longer sits tight.
- Replace them if sharpening no longer restores smooth blending.
Choose a blender that works with you, not against you. Trust what your blender tells you. A fresh blade can restore easy mornings and save you from one more stubborn smoothie.
Keep Blender Blades Sharp Longer
If you have just decided a blade needs replacement, the next best move is to help the new one last.
You can do that with steady maintenance habits that protect blade longevity. Unplug the blender before you clean it, then rinse the jar and blade right away so food doesn’t dry and cling. Wash with warm soapy water, dry every part, and reassemble it tightly.
Whenever you blend, add enough liquid at the start and avoid hard, frozen loads that strain the edge. Use short bursts instead of long runs, and stop once the mix is smooth. Check the blade often for wobble or buildup, because small fixes now save you trouble later.
With care, your blender will stay ready to perform.
Avoid Common Sharpening Mistakes
Whenever you sharpen blender blades, the biggest mistakes usually come from rushing or using the wrong method. You should check first, then act.
Unplug the blender, remove the blade assembly, and handle every part with care so blade handling stays safe. Keep the bevel angle the same as the original edge, or the blade will work harder, not better.
Use a stone, rod, or fine sandpaper, and move gently.
- Don’t press too hard.
- Don’t file back and forth.
- Don’t sharpen one side more than the other.
After each pass, pause and inspect the edge. That small habit helps prevent overworking the blade and keeps your blender performing well.
Signs Your Blender Needs More Than Sharpening
A careful sharpening job can bring a tired blender back to life, but some problems point to more than a dull edge.
If your blender still struggles after sharpening, listen for grinding, humming, or a motor that slows down quickly. That can signal motor burnout, not blade trouble. You should also watch for wobbling, cracked parts, or leaking seals, since those issues let liquid escape and strain the drive system.
If food stays chunky even after you clean and sharpen the blades, the assembly may be bent or worn. In that case, you’ll usually need replacement parts, not another pass on the stone. Noticing these signs early helps protect your blender and keep your kitchen running smoothly.
Frequently Asked Questions
Can All Blender Blade Assemblies Be Sharpened Safely?
No, you cannot safely sharpen all blender blade assemblies. You need to check the blade material and the manufacturer’s safety limits first, because some designs should be replaced instead of sharpened to keep you safe.
What Angle Should I Use When Sharpening Blender Blades?
Use the blade bevel as your guide. Match its edge geometry, usually about 10 to 20 degrees. This keeps the cut true and helps preserve the blade without reshaping it.
Can a Ceramic Rod Sharpen Blender Blades Effectively?
Yes, you can use a ceramic rod for blade edge maintenance if you match the original bevel. However, it is best for light honing, not major sharpening. Ceramic rod durability helps, but you still need to use care.
How Often Should Blender Blades Be Sharpened?
Rarely, you should sharpen them only when performance drops. Sharpening frequency depends on use, and good blade maintenance means cleaning after each blend. If your blender still struggles, inspect the bevel before sharpening again.
Should I Sharpen Blades by Hand or Replace Them?
You should start with hand sharpening if your blade is just dull, since it is cheaper and can work well. If you have chips, rust, or the maker says not to sharpen it, blade replacement is the safer choice.